|
Home
|
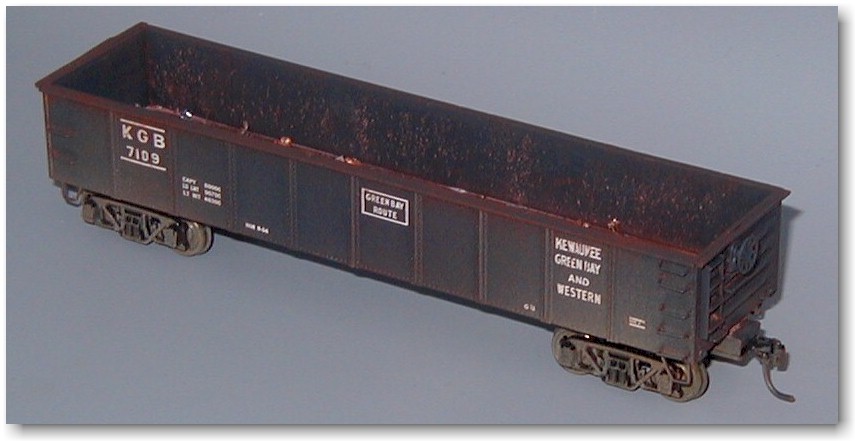
Here's my HO model of a KGB 7100- class gondola as it might appear in the 1950s or early 1960s.
The inspiration for this model came from the new GBW/KGB 40' wood boxcar
decal set from

Mark Mathu photos, 2003,
2014
The PrototypeThe prototype Kewaunee Green Bay & Western 40-foot gondolas were ex-Norfolk & Western 9000-cars built 1909-1913. The KGB acquired the cars in January 1936 and some of these cars remained on the KGB roster until 1964. The most notable spotting feature was the ten panels on each side of the 40' long steel car. Andy pointed out that modeling this car was on his to-do list and he thought that a Model Die Casting (now Athearn) gondola made a good starting point. We had a little back-and-forth discussion about specific details, lettering and herald colors, we soon were off to our workbenches! The ModelWe started with a MDC 40' Steel Gondola. Make sure to get one of the flat end (not oval end) models. The end panels are slightly larger than the interior panels on the KGB cars, while the MDC model has equal-spaced panels; and the prototype's outside dimensions are 39'-11" x 9'-9" and the top of the gondola is 8'-2" above the rail, compared to the models dimensions of 40'-9" x 9'-4" x 9'-2". Not exact, but close enough. And close enough became my mantra for this project. An undecorated car is ideal, but many of these kits are black with minimal white lettering. I found a car pre-lettered for "Maintenance of Way," so I started by soaking the plastic car body in 70% isopropyl alcohol for about a day. A little scrubbing with a toothbrush took off the paint. The ribs on the kit extend below the bottom of the gondola -- a characteristic of the Chesapeake and Ohio prototype that the model is based on. I used a sprue cutter to remove the extensions at each rib and also the stirrups at each corner and then used a large file to smooth the bottom of the car body. Next, I used a knife with an DetailsI replaced the grabs and steps with Tichy
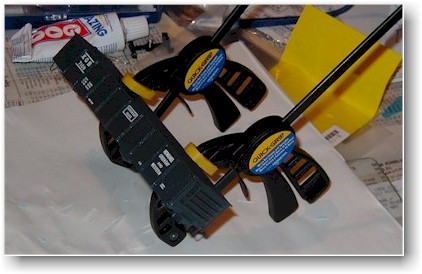
Train Group #3021 grab irons and The underframe of the MDC kit is a metal casting. I used a motor tool to grind down the noticeable casting sprues, but didn't add any additional underbody detail. If someone wanted to take this project to the next level, adding underbody detail would probably give the most bang for the buck. I glued the underbody to the plastic body with Zap CA and added the brake wheel to the end of the car body. The basic car was ready for the paint shop. I gave it a coat of Modelflex #16-05 Weathered Black and then some Gloss #16-603 in the locations where I would be decaling. DecalsThe car had standard GBW lettering so I was able to use a The car number was cut from the boxcar number set, using the middle digits of an "8100" from the set and then adding a "7" to the left and an appropriate finishing number, remembering that the KGB cars were odd numbers only. Andy and I used two photos to determine the positioning of the lettering. Interestingly enough, the cars were lettered differently! KGB 7177 had the CAPY data below the road number in the second panel, while 7195 had that data on the third panel. Andy and I both chose to model our cars after the 7195 style, as that was the later photo and matched the other open-topped cars better. I used the largest dimensional data in the Scale Rail Graphics set for the car; again, this was a "close enough" decision. A Microscale or similar set could be used to get more exact data but considering the accuracy of the basic car body and the scale I had no problem with using the Scale Rail Graphics data. My favorite use of the Scale Rail Graphics set was to cut out letters from some end reporting marks to add a 'GB' AAR code to each side of the car. The 'Caldwell Snubber' lettering from the decal set was used as a filler in the far right panel of each side and a 'NOR 9-54' shop date completed the "close enough" lettering. Two applications of Microscale Micro-Sol set the decals in place. Trucks & WeatheringThe prototype had Andrews trucks so I added a pair of Accurail #156 Andrews Trucks, sans wheels. Kadee #58 couplers were added and the project was ready for weathering. I used A.I.M. products Real Rust to weather the outside of the car. I dribbled some rubbing alcohol on the inside of the car and sprinkled some A.I.M. rust powder with a toothbrush on the inside walls of the car. Modelflex Mud #16-73 was sprayed on the trucks and adjacent car body and some Badger 16-08 Reefer Orange was sprayed on the coupler head and over the lettering to simulate a light coating of fresh rust. Finally the car was sprayed with Testors Dullcoate from a can and I sprinkled a few metal scraps painted brown and black on the floor of the car while the Dullcoat was wet to simulate scraps from a prior shipment. The trucks were fitted with Intermountain 33" metal wheel sets that were weathered separately and had the treads polished with my motor tool. |
||||||||||||||||||||||||||||||||||||||||||||||||||||